- Triumph Street Triple
- Brand
- Akrybius (16)
- Avdbmoto (26)
- Brembo (11)
- Danmoto (12)
- Delkevic (42)
- Exan (34)
- F & F Carbon (17)
- Gpr (33)
- Grmoto (20)
- Gstradingonline (11)
- Hp Corse (9)
- Jaybeebikerbits (18)
- Mivv (13)
- Moto Vision (9)
- No Brand / Generic - (44)
- R & G Racing (17)
- Rizoma (8)
- Triomphe (8)
- Triumph (608)
- Zard (19)
- Other (4391)
- Category
- Intended Use
- Manufacturer
- Product Type
- Version
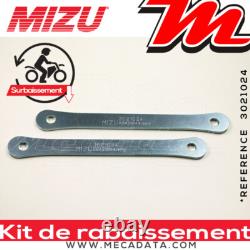
Triumph Street Triple S Lowering Kit (HD01) 2019 Mizu 35 mm


Mizu Lowering Kit for Triumph Street Triple S (HD01) from the year 2019. This kit lowers your motorcycle by 35 mm. Replacement of original suspension linkages. Assembly time and difficulty indicated by the manufacturer. Mizu lowering kits provide a more dynamic riding position for your motorcycle. These kits allow you to bring your legs closer to the ground more easily. Touring or sports motorcycles will offer a seat height according to your needs. Mastering the motorcycle when stopped will help you feel secure and give you a new pleasure in riding. Mizu lowering kits are tested and specifically developed for each vehicle.
The rear suspension linkage is modified with a kit specific to each motorcycle model. The lowering value indicated is measured vertically above the rear wheel axle. These kits come with a 2-year warranty and are manufactured according to ISO 9001 standards.
In principle, we recommend that the installation and modification of these suspension parts be carried out by a specialized motorcycle workshop. Experience and mechanical knowledge cannot be replaced by the following assembly instructions. Before you start working on your vehicle, please ensure that your motorcycle is safely secured.
This product can only be used on the type and model of motorcycle mentioned and indicated on the application list. Do not attempt to install this product on a different vehicle.Brand, model, type, and model year must match. For torque specifications, you must use the specifications from your vehicle's manufacturer. Please read the instructions carefully before starting the installation. Ensure you have all necessary tools and that they are in perfect condition. Protect your motorcycle in the work area.
Cover delicate parts with blankets or other appropriate materials. Make sure your motorcycle is securely fixed and stabilized before you begin working on your vehicle. To facilitate installation, the rear wheel should have a ground clearance of about 4 to 5 cm. Check all parts before, during, and after each step. Clean and degrease all surfaces of the parts before assembly. Be careful during assembly to avoid damaging or scratching the motorcycle. A mistake can easily happen, and parts can be easily damaged. Check and ensure that the lowering kit does not touch or rub against any other part of the motorcycle. Compress the rear suspension fully; all parts must move freely, and no rubbing is allowed.Recheck the tightening of all bolts. You need to adjust your suspension settings to the new circumstances. With the ground clearance being reduced, adapt your riding style. Always check the operation and movement of the rear suspension and swingarm before each use.
Installation of the lowering kit. Loosen the nuts of the original linkages and remove the mounting bolts using appropriate tools. Remove the original linkages and replace them with the MIZU lowering kit.
In most cases, these are about 3 to 10 mm longer or shorter than the original linkages. It should be visible from the outside. Depending on the model, please use new lock nuts and adhere to the torque specifications prescribed by the vehicle manufacturer. Once the installation is complete, ensure the free movement of the brake line, shock absorber, and swingarm. Check the operation and travel of the suspension.When lowering the motorcycle, the tension of the chain is generally increased. Always pay attention to the correct tension of the drive chain and follow the manufacturer's instructions. Finally, it should be noted that the vehicle must have a stable position on the side stand and center stand. Depending on the motorcycle model, the side stand and center stand, if your motorcycle has one, may need to be adjusted if necessary. The value of the rear lowering is measured vertically above the rear wheel axle and may be subject to variations depending on wear and shock absorber adjustment.
The motorcycle accessory specialist in France, the best prices, the best service at Mecadata.

